XJS 3.6 Clutch Replacement
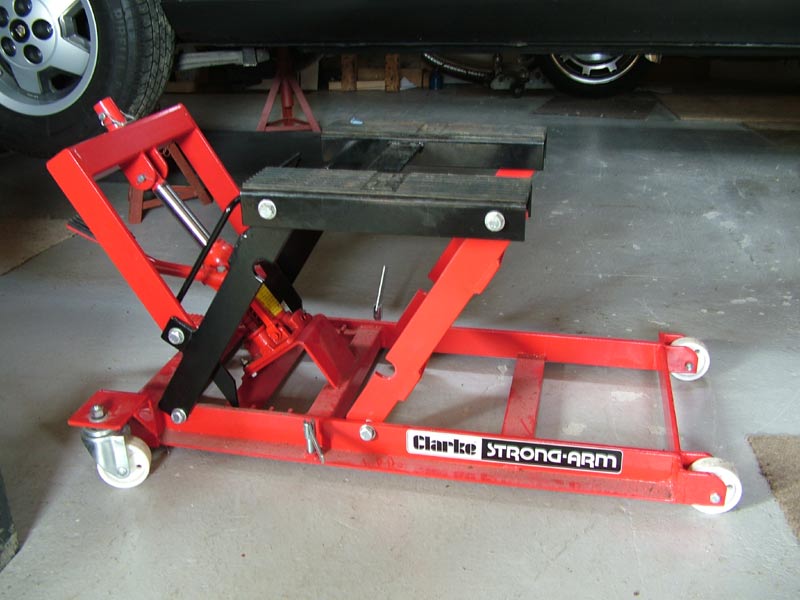
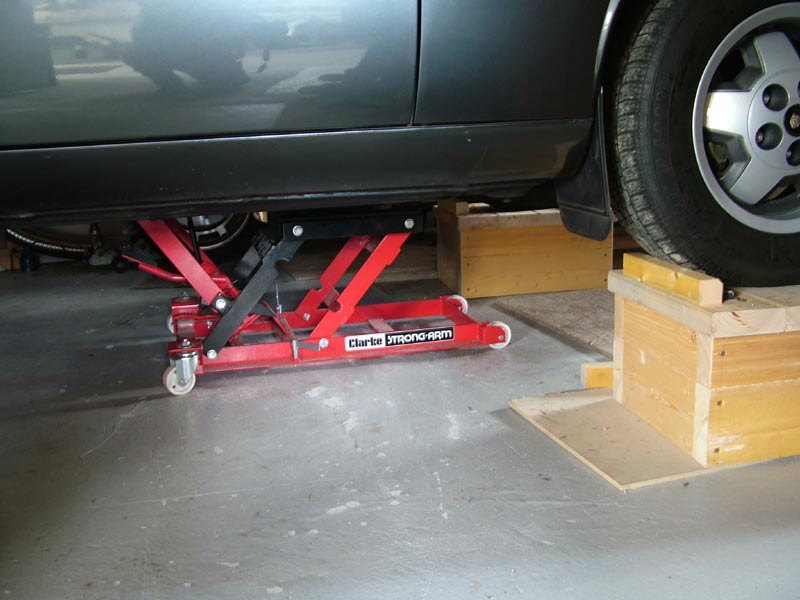
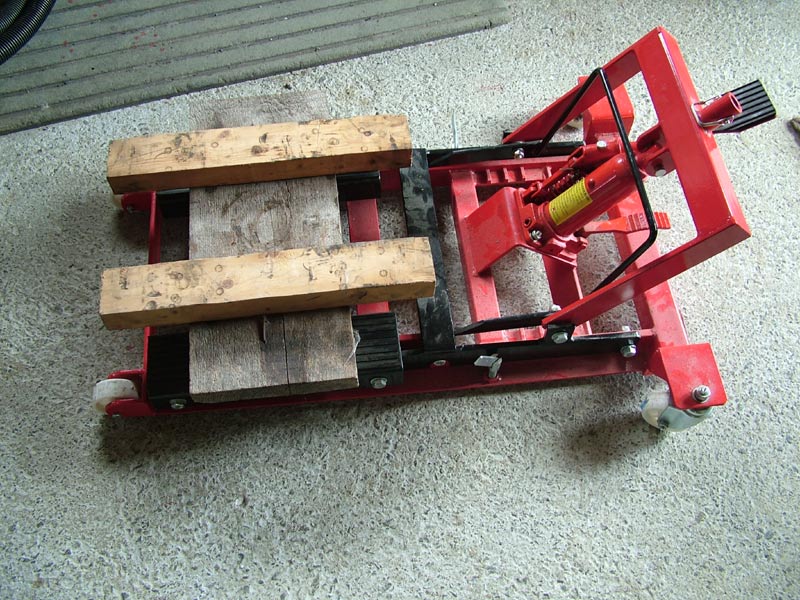
Some time back I was tootling back home in the XJS from a little trip and as I booted the car up a fairly steep hill I was convinced that the rev counter dropped a bit more quickly than normal when I eased off. I repeated this a couple of times to confirm my suspicions and I was not imagining it! The car only had 25000 miles on it when I did the re-shell back in 1990 and in 20 odd years since it has never had the clutch replaced. Under normal driving there was no evidence of slippage but I think we all know it was the beginning of the end. I think the damage was possibly done many years ago when I had to reverse a huge twin axle trailer down our driveway and round some awkward corners and over uneven ground when I was bringing the 'D Type' kit home from Proteus. I got myself in the right frame of mind to pull the box out and replace the whole clutch - always worse thinking about it than actually doing it. I have a really useful motorcycle lift (Clarke Strong Arm) which easily lifts the 800 lb 1500 Wing well off the ground and I reasoned that with the car at a suitable height, this lift would go under the car and support the gearbox in order to lower it out and away.
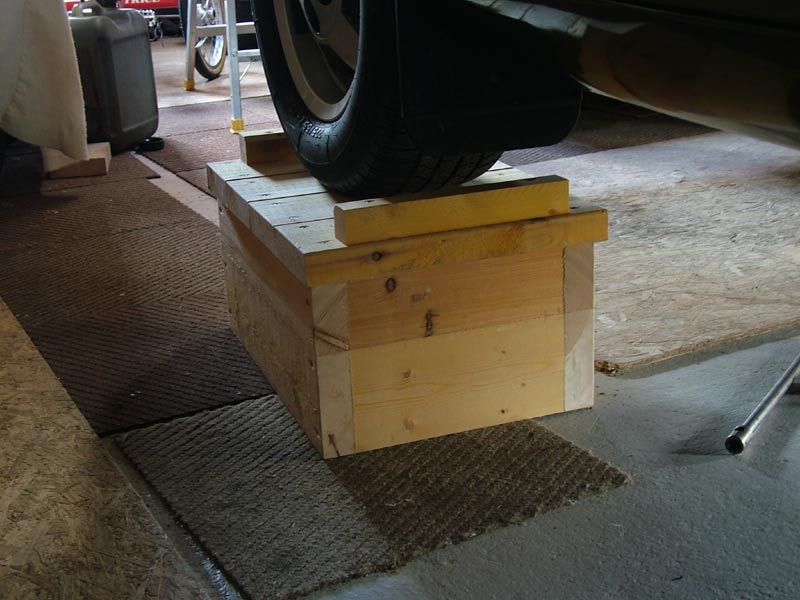
Many years ago (over 30 anyway) my great friend David Durham had made me a really strong pair of heavy wooden car ramps with detachable sloping sections. I used these in the original build of the XJS and many times afterwards for general servicing but quickly realised that with my big trolley jack it was easier to lift the front of the car and then put just the level sections under the front wheels and jack the back up and support that with heavy duty axle stands. Before we moved up here to Orkney, the ramps were starting to get a bit tatty and some worm had appeared so they were consigned to the fire with the intention of making new ones when necessary.
I got round to making the new ones with the impending clutch job to be done just recently from some new 6 by 2 glued and screwed together - a little wider than the originals and they have proved very useful in service. I didn't bother making the detachable sloping parts and just concentrated on the level sections.
Strong enough to support the front end of a bus!
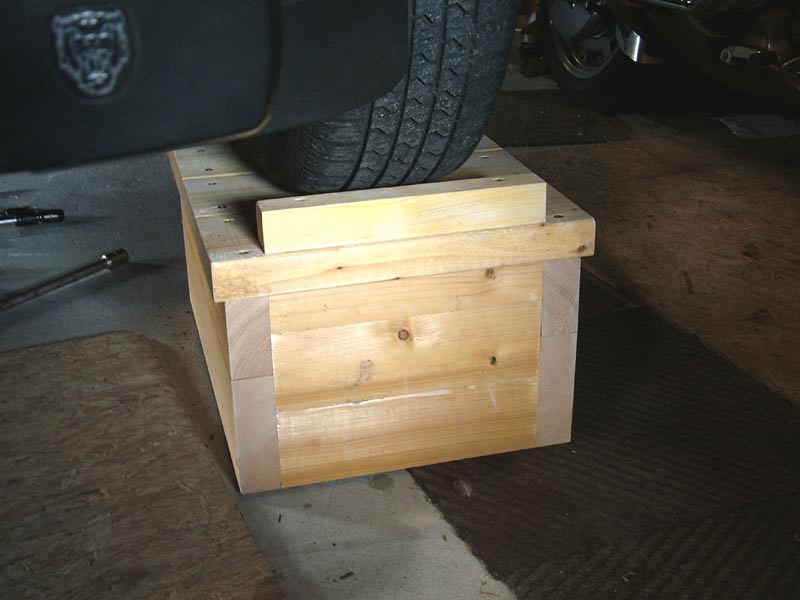
Without the sloping sections there is far more access than with conventional ramps
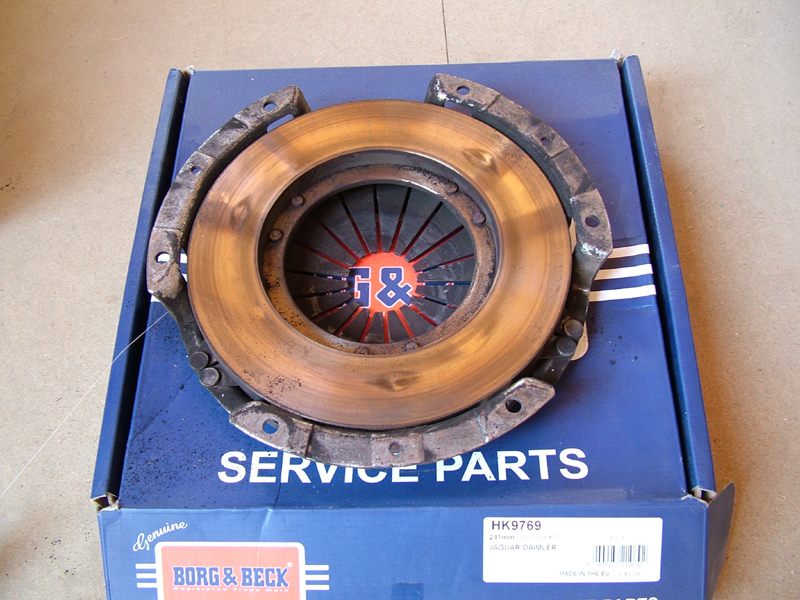
I wanted to fit a genuine Borg and Beck clutch and found one on Ebay at a little more than half of the cost from the local factors. I usually try to buy locally but I don't want to have my leg lifted unnecessarily.
The first stage was to drain the oil from both engine and gearbox - it was due an oil change and filter anyway. The Y section of the exhaust and intermediate boxes have to come off, followed by the big rear heat shield and then the prop-shaft. It would be usual practice to support the rear of the engine from above with a spreader bar across the wing channels, but I have a very heavy duty bottle jack which fits under the rear of the very thick cast alloy sump with a stout piece of wood to spread the load. Using this method the whole process can be done from below to ensure that everything lines up for withdrawal and refitting. The gear lever knob has to be removed and then the rear sprung cross-member to gain access to the lower end of the gear lever and the remote bracket. Next in line for removal are the clutch slave cylinder with its pushrod plus the reverse light switch wires and the speedo transducer connector.
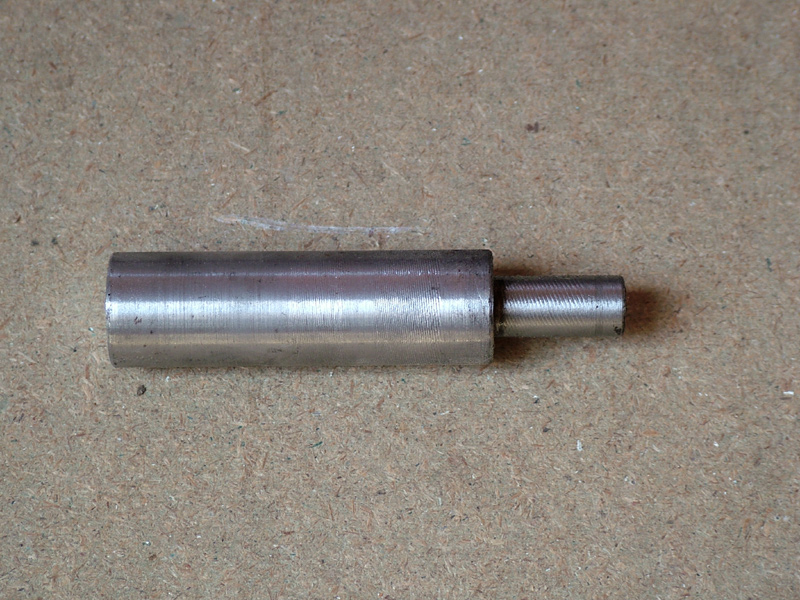
The 10 bell-housing bolts came out next and then it was time to fit the bike lift and a home made wooden cradle to support the box. It slid away from the engine very easily and with a bit of lowering and sliding rearwards it was soon down on the lowest setting on the lift. It slid out from under the car with about an inch to spare and was ready for cleaning and release bearing removal. I made up a dummy shaft on the lathe, so that the clutch driven plate would line up properly and then cleaned the flywheel (which was in perfect condition) and replaced the driven plate and clutch cover with the new items from the 3 piece kit.
I separated the bell housing from the box to make it all a bit more manageable for cleaning and then hit on the idea of refitting the bell-housing with clutch release arm and new bearing to the back of the engine and then fit the box to the housing. This gives much more room to get the 10 bolts back in and torqued up without the box being in the way.
With the box loaded onto the lift again it was a simple matter of jiggling heights and angles until the gearbox shaft entered the bell-housing and then making sure that the shaft sleeve entered the clutch release arm - there is a bit of the arm sticking out from the housing so you can feel when all is lined up. The box just slid forward to the mounting studs and with a quick wiggle and a twist of the tail shaft it entered the driven plate and closed the gap. Just four nuts and washers then hold the box to the bell-housing on the studs and just the one above the slave cylinder hole is a little awkward to access, but not impossible alternately using 2 different length ring spanners until all was snug. The rest of the re-assembly is really quite straightforward but I spent some time cleaning parts and painting the prop-shaft and greasing the UJ's again. There were one or two places where the original under-sealing - done over 20 years ago - had been scratched through, so half an hour was spent sorting out those.
I just got to the clutch in time really as there was some plate left above the rivets, but not much!
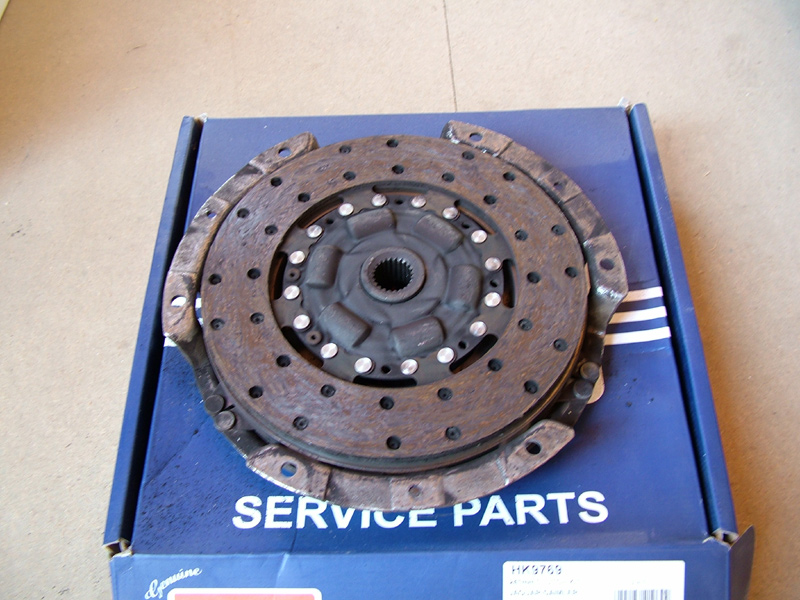
The plate looks better in the pic than it really was, with only a very small amount of friction material left.
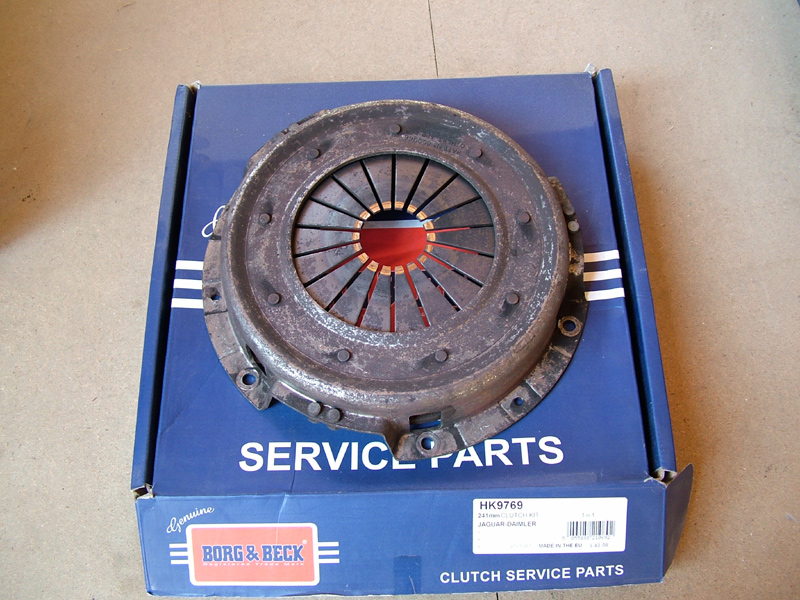
The pressure plate was just very lightly polished, as was the flywheel, with no scoring or other observable or measureable wear. The area where the release bearing rests on the fingers was well worn, making them very thin, so that could have been a breakdown if the bearing had punched its way through the centre.
Also the release bearing was really noisy and the boss which it is mounted on was as dry as a bone and very stiff in the clutch release arm with no evidence of any lube. I used Honda Moly 60 paste which I use for the drive shaft on the 'Wing, to lightly lube those areas plus the spline grease supplied with the clutch kit for the driven plate. I had not noticed any undue noises or stiffness in clutch actuation, as these things creep up on you very slowly but the difference is very noticeable with the new parts and proper maintenance.
New oil and filter for the engine plus refilling the box were next and I drained the rear axle and refilled that with the correct oil for the limited slip differential. There was one bit of remedial work on the air filter case - after cleaning in the parts washer I noticed a couple of cracks where the intake trumpet joins the cover. I drilled small holes at the ends of the cracks and then silver soldered the cracks and holes and gave it a coat of paint in the repaired area prior to refitting.
I'll book it in for an MOT soon so that it will be all ready for our first ever trip up to Shetland for their Classic rally - held every 2 years at the end of May and then a few trips to other shows this season, plus our own annual Orkney Vintage Rally in August.
So that's the clutch replaced - I know at my age I should have just sent it away to a garage to be done but I still feel uncertain about trusting it to anyone having seen some of the rough bodges that go on. It's easy to find simple ways to get around having to lift heavy gearboxes and with a bit of forethought things can be adapted to make everything safe and secure. I realise time is money but I got great satisfaction from doing it myself, after all I built the thing in the first place and just took my time cleaning stuff as I went and replacing a few more bolts with stainless ones sourced from Ebay.