2000 Daimler Super V8
Part 2 - Some TLC
I took the car off the road at the end of October for the Winter and decided to do a bit of investigative work around to front end to see if there was anything festering behind panels or in hidden places which might need some remedial work. The first to be removed was the undertray and wheel arch liners, which came away without drama. Next off were the grill, headlamp surrounds, air ducts and lower chrome grill splitter. This meant that the bumper could come off next - it would be good to see what condition the notorious mounts were in. The long through bolts were easy enough but even with those removed, although the bumper was obviously loose, I couldn't seem to draw it off the mountings. I had not realised that the steel spacers which the large bolts pass through are actually free (although not very) to move in the lower section of the beam and due to the height of the adjustment on my bumper, these spacers were high enough to jam inside the aluminium castings on the mounts. I struggled in the very limited space available to remove the 3 bolts on each side which hold the mounting brackets to the front panel. I was then able to lower the whole assembly to the floor to disconnect the harness plugs. One of the mountings then came away very easily, but the other was still not for giving up. Eventually I got a 14mm taper tap and wound it gently into the spacer and as soon as it started to bind up, the spacer rotated and could easily be withdrawn - if I had known it was the spacer that was holding it all and that they were not part of the beam, I might still have all of the skin on my wrists and knuckles!
The aforementioned mountings were in excellent condition and even the large threaded inner adjusters were still free. Only the mickey-mouse torx screws were rusty but even they came out without resorting to bad language. I will not remake the metal parts of the mountings as I did on the rears but will instead clean them up and coat them liberally with copper grease, after replacing the torx screws with stainless self tappers of course. I don't think they will give further trouble in my ownership, especially the front ones as they are shielded from the worst of the weather, unlike the rears which are in the firing line of any salt spray encouraged by the scoop of the rear bumper to do its worst.
The wings were very easily removed with just nine bolts:
1 off in the rear lower edge on the sill top
2 off in the A post
2 off in the front end holding it to the lower section of the inner wing
4 off in the flange along the top edge
There is also a short run (about 2") of seam sealer holding the very rear of the wing just in front of the windscreen at the end of the plenum/scuttle cover - parted with a backed razor blade.
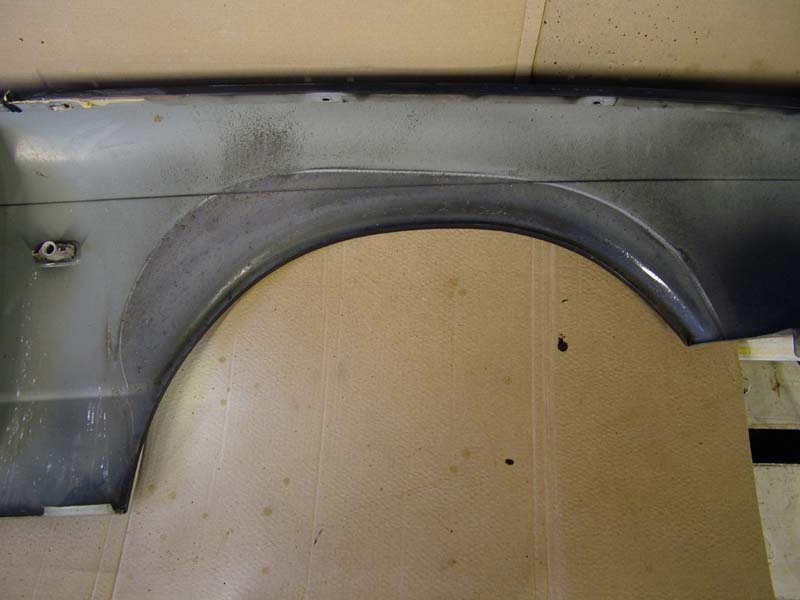
This is the inside of the nearside wing, almost as good as the day it was fitted. The darker patch above the arch which extends to just above the swage line is where the simple arch liner fits against - this will come in for a good liberal coat of underbody wax. Regular cleaning will help keep this vulnerable area free from salt laden crud.
Once removed, the wings were cleaned off inside and treated with Bilt Hamber S50. as was the inner wheel arch and the box section along the top edge of the inner wing. There is a series of access holes in this box section, covered with adhesive tape which, after nearly 15 years had failed. Following liberal injection of cavity wax and then cleaning the surrounding areas, I refitted small squares of 'Gorilla' tape over the holes. The rear flanges of the front wings are made in 2 pieces, spot welded together down the whole length, so they came in for extra treatment, both inside the wing and outside by the door shut, to prevent any corrosion creeping in between the welds.
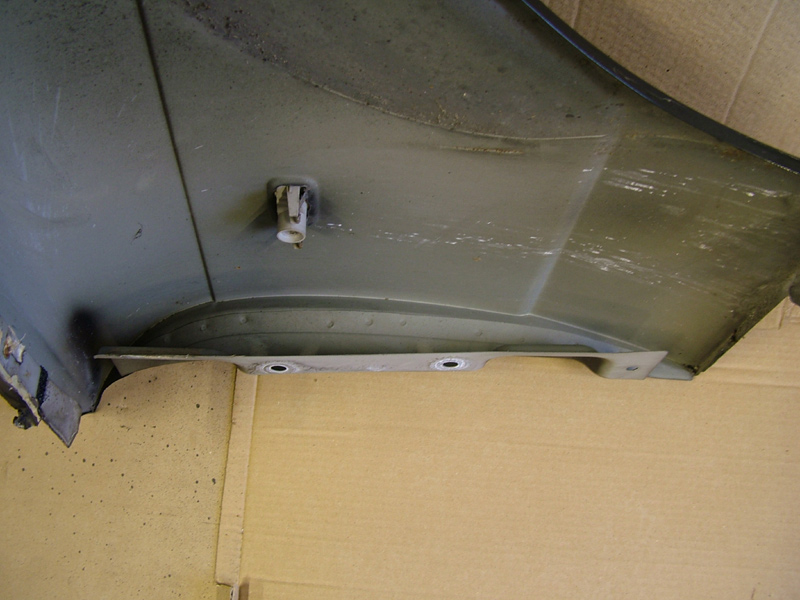
The spot welds are clearly seen here, so far with no corrosion issues and I hope to keep it that way as long as I am the custodian.
I removed the electrical multi plug at the lower end of the 'A' post which brings power from inside the car to the front end services, in order to check for any green (corroded) terminals but all was pristine, so I smeared a small amount of dielectric grease over the pins and fitted it back, before replacing the outer wing again - all very straightforward. I spent some time with the workshop vacuum, removing countless dead insects and leaves from the face of the radiator and the power steering pipe cooling fin wires.
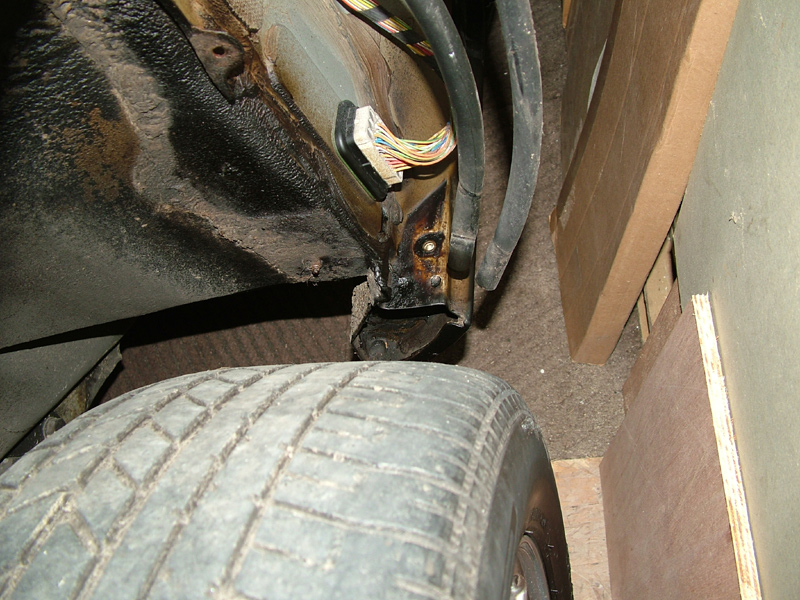
This shot shows the multi plug for the front harness and the condition of the top of the forward end of the sill - no corrosion issues around this well known trouble spot.
Everything looked fine around the front end of the chassis legs, so after a good blast with cavity wax it was time to replace the bumper mounts, followed by the bumper itself. I protected the lower edges of the front wings with tape, as I was on my own replacing the bumper - in the event it engaged on both sliders and went on to the mounts in one easy operation, ready for the liberally greased bolts to be fitted from under the bumper.
Back to Part 1
Part 3 More rustproofing